How to block a person from email
''Imaging gearing up for a busy Monday morning with coffee in your hand, you open your email inbox to strategize for the day ahead. But instead of actionable updates from your team or exciting leads, you’re bombarded with emails that make your inbox look like a digital landfill. Endless spam, irrelevant pitches, and persistent, unwanted senders have cluttered your workflow.
This was an everyday struggle for Kelvin, the founder of a fashion brand. He discovered that he was wasting valuable hours each week sorting through the clutter — time that he could have used to expand his brand. Despite his polite responses, the emails kept coming back into his inbox, cluttering his workflow and draining his focus. He chose to take back his email because he was frustrated, and we'll show you how to do the same in this article''.
Whether you’re a marketer trying to focus on high-priority campaigns, a startup founder juggling a million tasks, or an SMB owner managing multiple responsibilities, an overloaded inbox can severely hinder productivity. Let’s dive into actionable strategies for blocking unwanted emails, organizing your inbox, and regaining peace of mind.
Table of Contents
- Reasons why Blocking Unwanted Emails Matters for Professionals
- Step-by-Step Guide to Blocking Emails
- Blocking Emails on Gmail
- Blocking Emails on Yahoo Mail
- Blocking Emails on Outlook
- Blocking Emails on Apple Mail
- Advanced Tactics for Marketers and SMB Owners
- How to Reduce Spam Permanently
- The Seamailer.app Advantage
- Conclusion
Reasons why Blocking Unwanted Emails Matters for Professionals
Unwanted emails aren’t just annoying—they can have real consequences for your productivity, security, and even your brand’s reputation. Here’s why addressing the issue is crucial:
- Time Management: Each irrelevant email you sift through adds seconds or minutes to your day, which compounds over weeks and months.
- Focus: Constant notifications from unwanted emails can disrupt your focus and workflow.
- Security Risks: Some emails might contain phishing links or malware, posing a threat to your business.
- Inbox Overload: A cluttered inbox can make it harder to spot important communications, leading to missed opportunities.
The good news? You can take control of your inbox with the right tools and strategies. Let’s explore the steps to block unwanted emails.
Step-by-Step Guide to Blocking Emails
1. Blocking Emails on Gmail
Gmail is one of the most popular email platforms for marketers and businesses. It does an excellent job of organizing your incoming mail, automatically sorting messages and filtering out spam. However, some unwanted emails can still slip through and clog your inbox.
One of the most effective ways to stop these nuisance emails is by blocking the sender. This ensures that any future messages from that address go straight to your Spam folder, keeping your inbox clean and distraction-free.
Here’s how to block a sender on Gmail using a mobile device:
- Open the email from the person you want to block.
- Click on the three-dot menu in the top-right corner of the email.
- Select “Block [Sender’s Name]” from the dropdown menu.
- A pop-up window will appear, confirming if you want to block the sender's address and move all future messages from it to the Spam folder.
- Confirm your choice by clicking “Block” in the pop-up window.
On Desktop:
- Go to the Gmail website and log in.
- Open the email from the sender you want to block.
- Click on the three dots (More options) in the top right corner of the email.
- Choose “Block [sender’s name]” and confirm.
Once blocked, all future emails from this sender will go directly to your Spam folder
You might want to unblock a sender in Gmail. To do that, open any email from them, click More (the three-dot menu), and select Unblock [sender’s name]. If you can’t find an email from the sender, click the gear icon to open Settings, then select See all settings. Navigate to the Filters and Blocked Addresses tab, locate the sender’s email address, and click the Unblock link next to it.
Spammers often generate random email addresses, making it frustrating for users to block each new message manually. As a result, many people eventually stop trying and accept a cluttered inbox filled with spam.
Fortunately, Gmail offers a solution: its block sender feature allows you to create rules that block entire domains instead of individual addresses. Here’s how to set up filters to block unwanted emails in Gmail:
- Click Show search options (found on the right side of the search bar).
- Enter the specific domain or email address in the From field.
- Then, click Create filter in the lower-right corner (it may appear greyed out).
- In the pop-up window, check the Delete it option to automatically remove all emails from the specified domain.
- Then, click Create filter to apply the rule.
2. Blocking Emails on Yahoo Mail
Yahoo allows users to block up to 500 email addresses, ensuring unwanted messages are automatically redirected to the Spam folder for a clutter-free inbox.
Follow these steps to block an email address on Yahoo:
- Sign in to your Yahoo Mail account.
- Click on the Settings icon and select More Settings from the dropdown menu.
- In the left-hand menu, select Security and Privacy.
- Next to Blocked Addresses, click Add.
- Enter the email address you wish to block in the Add an email address to block field.
- Click Save to confirm.
To unblock an email address on Yahoo, return to the Blocked Addresses section and select the sender you wish to unblock.
The Yahoo mobile app does not offer a direct option to block senders. However, you can mark emails from unwanted senders as spam.
To do this,
- Open your inbox and either select the unwanted message or use the search function to locate the sender.
- Check the box next to the email, tap More in the bottom action bar,
- Then choose Mark as Spam.
3. Blocking Emails on Outlooks
Outlook, previously known as Hotmail, offers a simple method to block unwanted emails. By blocking a sender, you ensure that their future messages won’t reach your inbox.
Here’s how to do it on Outlook’s web version:
- Open your inbox.
- Right-click on the email in your inbox.
- Select an email ( "Junk") from the sender you want to block.
- Choose Block to prevent further messages from that address.
- Confirm by clicking ok.
Blocked emails will be sent to your Junk Email folder automatically
On Mobile:
- Open the Outlook app and locate the email from the sender you wish to block.
- Tap and hold the email until it is selected.
- Tap on the three dots (More options).
- Choose “Block [sender’s email address]” and confirm.
Pro Tip: Leverage Outlook’s “Rules” feature to organize emails efficiently. For example, create rules to move specific senders’ emails to junk or a designated folder.
To manage your blocked senders list or unblock emails in Outlook, navigate to settings (gear icon), select Mail, and then go to Junk Email. From there, you can add or remove senders and domains from your blocked or safe sender list.
On the Outlook mobile app, you can block specific senders, but each one must be blocked individually.
4. Blocking Emails on Apple Mail
If you are using Apple Mail on macOS or iOS, knowing how to block unwanted emails can help keep your inbox clutter-free. When you block a sender through the Mail app, their messages are automatically redirected to the Trash folder, and this setting syncs across all your Apple devices.
Here’s how to block a sender in Apple Mail on macOS or iOS:
- Open the email and click on the sender’s email address.
- Tap the sender’s name twice.
- Select Block this Contact from the options.
- Confirm your choice to finalize the block.
Once blocked, future emails from that sender will be sent straight to the Trash, ensuring they no longer disrupt your inbox.
Pro Tip: Enable the "Mark as Blocked" setting in Mail Preferences to automatically move blocked emails to the trash folder.
How to Verify an Email Address for Spam Before Blocking
Before you block an email sender, it’s wise to check whether their messages are genuinely spam or seem suspicious. Some emails might look dubious but pose no real threat, while others could be phishing attempts designed to steal your information.
To assess an email address for spam risk, you can use online tools that analyze sender reputation, domain activity, and other indicators of spam behavior. Services like Spamhaus and MXToolbox can help identify whether an email is associated with spamming or fraudulent activities.
Leveraging these tools enables you to make an informed decision—whether to block the sender immediately or report the email to your provider for further investigation.
Unsubscribing vs. Blocking: Key Differences
Managing unwanted emails effectively requires understanding the difference between blocking and unsubscribing.
Blocking prevents emails from a specific sender by redirecting them to your Spam or Trash folder. However, it does not stop the sender from continuing to send messages, nor does it remove your email from their mailing list. This means you might still receive emails, but they’ll be filtered out of your main inbox.
Unsubscribing, on the other hand, is a more direct way to stop receiving marketing emails or newsletters you’ve previously opted into. These emails typically include an unsubscribe link—usually at the bottom—allowing you to opt out of future communications. Unlike blocking, unsubscribing ensures the sender removes your email from their list, preventing further messages from being sent.
Advanced Tools and Tactics for Marketers and (Small and Medium Business) SMB Owners
1. Leverage Third-Party Tools
Platforms like Seamailer.app, Spamhaus, or MailWasher can offer advanced features to block spam and unwanted emails.
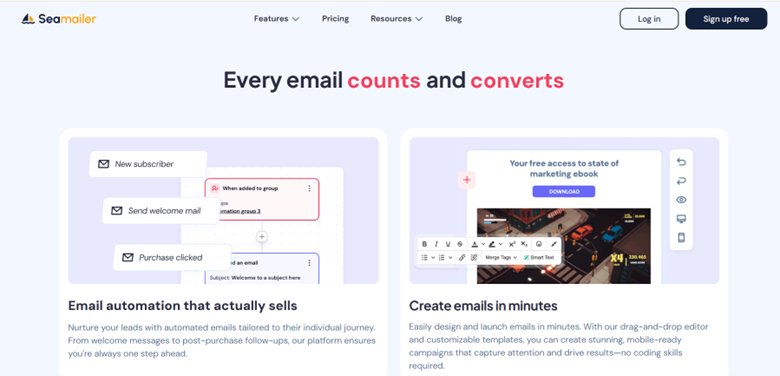
- Seamailer.app: Designed for marketers and SMBs, Seamailer allows users to organize their email campaigns while filtering out spam effectively.
- Spamhaus: A go-to for blacklist monitoring and spam filtering.
- MailWasher: Provides real-time spam filters and allows you to preview emails before they reach your inbox.
2. Use Email Whitelisting
Instead of focusing solely on blocking, whitelisting allows only approved senders to land in your inbox. Most platforms have this feature under settings or security preferences.
3. Unsubscribe Wisely
For emails that aren’t outright spam, clicking the "Unsubscribe" button is a quick fix. However, be cautious with suspicious emails to avoid phishing scams. Always verify the sender’s authenticity before unsubscribing.
How to Reduce Spam Permanently
Here are some long-term strategies to prevent spam from clogging your inbox:
1. Use a Separate Email for Sign-Ups: Dedicate an email address solely for newsletters and online registrations.
2. Enable Two-Factor Authentication (2FA): Protect your email account from unauthorized access.
3. Report Spam: Most platforms have a "Report Spam" option. This not only helps you but also improves the platform’s spam detection for others.
4. Invest in a Business Email Provider: Platforms like Google Workspace and Microsoft 365 offer advanced spam filters for professional users.
The Seamailer.app Advantage
At Seamailer.app, we understand the importance of a clean and efficient inbox for marketers, creators, and business owners. Our platform not only helps you manage email campaigns but also ensures that your inbox remains spam-free with:
- Advanced filtering algorithms
- Easy-to-use whitelisting and blacklisting tools
- Seamless integration with other email platforms

Conclusion: Reclaim Your Inbox Today
Just like Kelvin transformed his mornings from chaotic to productive, you too can reclaim your inbox and focus on what truly matters. Blocking unwanted emails is not just a technical task—it’s a step toward better productivity, enhanced security, and peace of mind.
So, take charge today. Whether you’re using Gmail, Outlook, or a dedicated platform like Seamailer.app, these strategies will empower you to stay ahead in your professional journey. Say goodbye to email clutter and hello to a streamlined inbox—you’ve got this!

