Step-by-Step Guide to Getting Started with Seamailer in 10 Minutes

If you’ve been searching for a fast, reliable, and affordable email marketing platform that helps you send professional campaigns without the tech overwhelm, Seamailer might just be your best discovery yet.
In this guide, we’ll walk you through how to get started with Seamailer in just 10 minutes, from creating your account to sending your first campaign. Whether you’re a startup founder, marketer, creator, or small business owner, this step-by-step tutorial will help you get your first email campaign live quickly and confidently.
Let’s dive in.
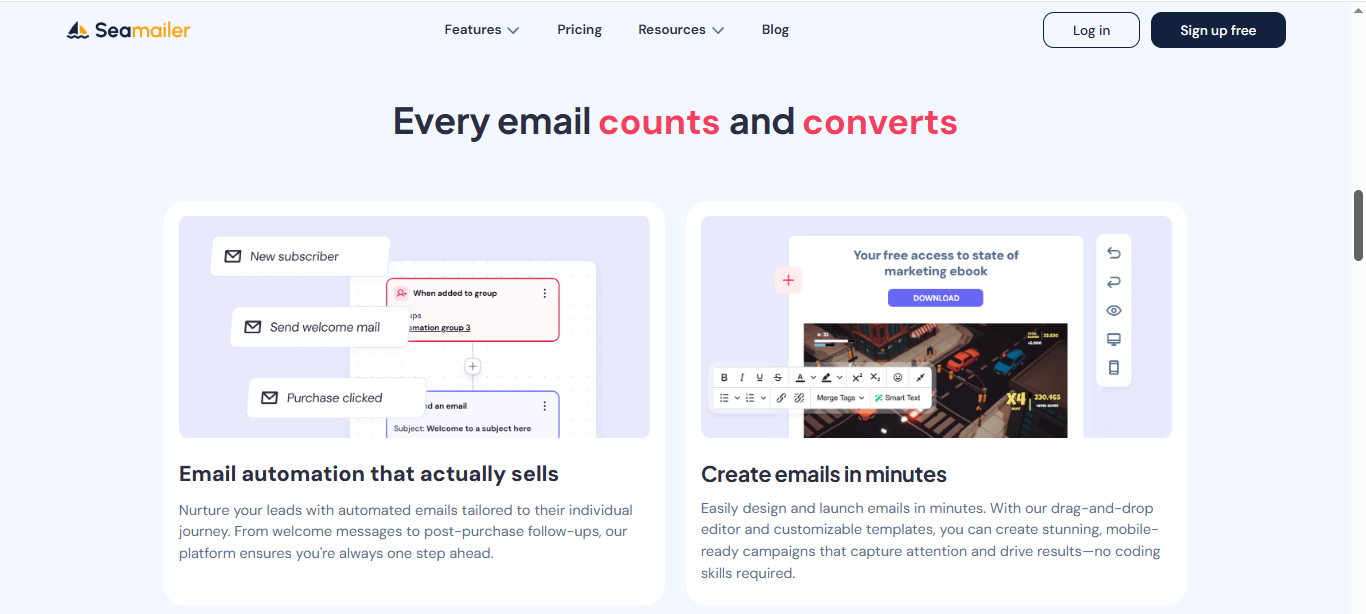
Why Choose Seamailer?
Before we jump into the how-to, here’s a quick reason why Seamailer has become the go-to email marketing tool for growing brands.
Seamailer was built for people who want simplicity and power in one platform. Unlike other tools that bury you in complicated settings and pricey plans, Seamailer focuses on what truly matters, creating, sending, and tracking impactful email campaigns that grow your audience and revenue.
Top reasons users love Seamailer:
- Ease of use: No need for a tech background. If you can drag, drop, and type, you’re good to go.
- Affordability: Transparent pricing that doesn’t punish you for growth.
- Deliverability: Seamailer’s smart sending infrastructure ensures your emails land in the inbox, not the spam folder.
- Automation made simple: Set up automated workflows without the confusion.
- Personalization: Create tailored experiences for your subscribers.
Now that you know what makes Seamailer special, let’s set up your account. it takes less time than brewing a cup of coffee.
Step 1: Create Your Seamailer Account (1 Minute)
The first step to getting started is signing up for a Seamailer account.
- Go to Seamailer.app.
- Click on “Get Started Free” or “Sign Up.”
- Enter your name, business email, and password.
- Verify your email address (you’ll receive a confirmation link).
Once verified, you will land on your Seamailer dashboard, clean, simple, and intuitive.
If you have used other email tools before, you will immediately notice how uncluttered and straightforward Seamailer’s interface feels. No unnecessary tabs or jargon, just what you need to start sending emails right away.
Pro Tip: Use your branded business email (e.g., hello@yourcompany.com) for verification. It helps build trust and improves your email deliverability later on.
Step 2: Set Up Your Sender Information (1 Minute)
Before sending your first campaign, you need to set up your sender information. This ensures your subscribers recognize who the email is coming from and helps with deliverability.
- On your dashboard, go to Settings → Sender Details.
- Add your From Name (the name that appears in your recipient’s inbox).
- Add your From Email Address (ideally your branded domain email).
- Add a Reply-To Email (optional but useful if you want replies to go elsewhere).
- Save your changes.
Seamailer will guide you through a quick domain verification step, it’s a one-time setup that ensures your emails are authenticated and not flagged as spam.
If you’re not familiar with DNS records, don’t worry. Seamailer provides easy-to-follow instructions for your specific domain provider (like GoDaddy, Namecheap, or Cloudflare).
Pro Tip: Verifying your domain early on helps you build a strong sender reputation from day one.
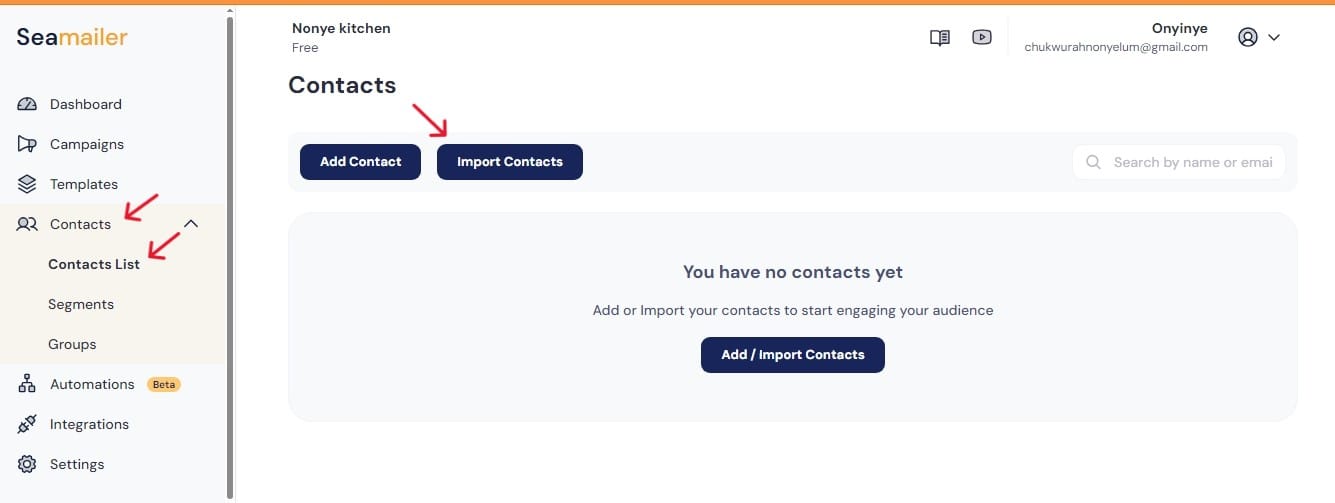
Step 3: Import or Add Your Contacts (2 Minutes)
Next, you’ll want to add your subscribers or leads to your Seamailer account.
You can either import your existing contact list or add subscribers manually.
To import contacts:
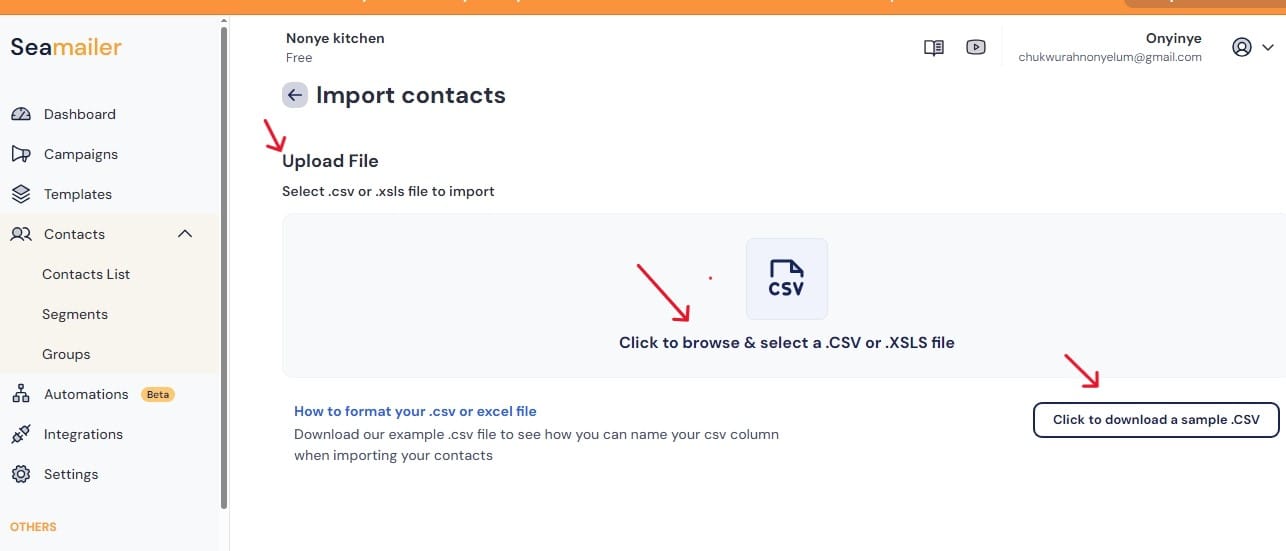
- Navigate to Contacts → Import Contacts.
- Upload your CSV file (ensure it includes fields like First Name, Last Name, and Email).
- Map the fields correctly. Seamailer usually detects them automatically.
- Review and confirm your import.
To add contacts manually:
- Click Add New Contact.
- Enter the subscriber’s details.
- Click Save.
Pro Tip: Always ensure you have permission from the people you’re emailing. Sending emails to purchased or scraped lists can harm your sender reputation and affect deliverability.
Once your list is uploaded, you can segment your audience based on engagement, purchase behavior, or demographics, making it easier to send targeted campaigns later.
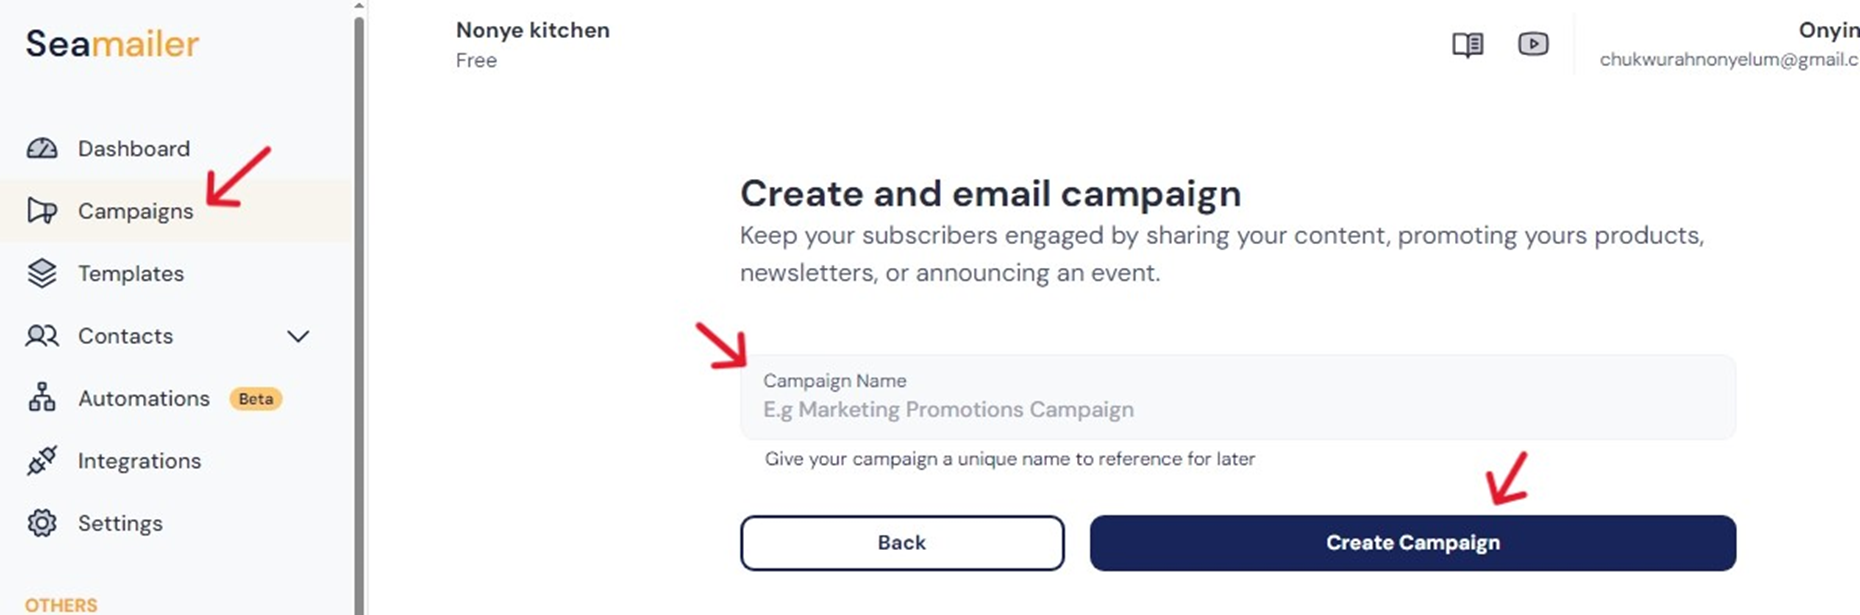
Step 4: Create Your First Email Campaign (3 Minutes)
Now comes the fun part which is crafting your first email campaign.
- From your dashboard, click “Create Campaign.”
- Choose your campaign type (Regular Email, Automated, or Transactional).
- Give your campaign a name (for internal use).
Then, select your email list or segment.
Next, you’ll enter the campaign builder, Seamailer’s drag-and-drop editor that makes designing beautiful emails effortless.
Choosing a Template
Seamailer offers a library of customizable templates for different goals like newsletters, promotions, announcements, and product launches.
You can:
- Choose a ready-made template, or
- Start from scratch if you prefer full control.
Editing the Template
Once you’ve picked a layout:
- Click on text blocks to edit content.
- Drag in images, buttons, or dividers.
- Add your logo, brand colors, and links.
The editor works in real-time, so you can instantly see how your email looks on desktop and mobile.
Pro Tip:
Keep your first email short and simple, maybe a welcome email introducing your brand or a special offer for new subscribers. Avoid overloading your design with too many elements.
Step 5: Add Personalization and Dynamic Fields (1 Minute)
Seamailer makes personalization super easy. You can add dynamic tags like:
- {{FirstName}}
- {{CompanyName}}
- {{SignupDate}}
For example:
“Hi {{FirstName}}, welcome to our community!”
Personalized emails have significantly higher open and click rates. Seamailer’s personalization engine ensures your messages feel relevant and human — not robotic or generic.
Pro Tip:
If you don’t have names for all contacts, add fallback text like “Hi there!” to keep your message natural.
Step 6: Preview and Test Your Campaign (1 Minute)
Before sending your campaign, always test it.
Click “Preview” to see how your email looks on both desktop and mobile screens.
Then click “Send Test Email”, this lets you review your design and ensure all links, personalization tags, and images work properly.
Things to double-check:
- Is your subject line clear and engaging?
- Does your sender name look right?
- Are all links clickable and pointing to the correct URLs?
- Is your email mobile-friendly?
Testing helps you catch small errors before your subscribers see them, a habit that saves your brand from unnecessary embarrassment.
Step 7: Schedule or Send Your Campaign (1 Minute)
Once your campaign is ready, Seamailer gives you two options:
- Send Now — Perfect for immediate sends.
- Schedule for Later — Choose the best day and time to reach your audience.
If you’re unsure when to send, Seamailer’s smart scheduling feature can recommend optimal send times based on your subscribers’ engagement history.
After sending, Seamailer automatically tracks performance, no manual setup required.
Step 8: Track Performance and Analyze Results (1 Minute)
Once your email is sent, Seamailer’s built-in analytics dashboard shows you real-time insights, including:
- Open rates
- Click-through rates
- Bounce rates
- Unsubscribes
- Device performance
These insights help you understand what’s working and what needs improvement.
For instance, if your open rate is low, tweak your subject lines next time. If your clicks are low, experiment with stronger CTAs or better visuals.
Pro Tip:
Focus on trends over time rather than a single campaign’s numbers. Seamailer’s analytics let you see long-term patterns and audience behavior.
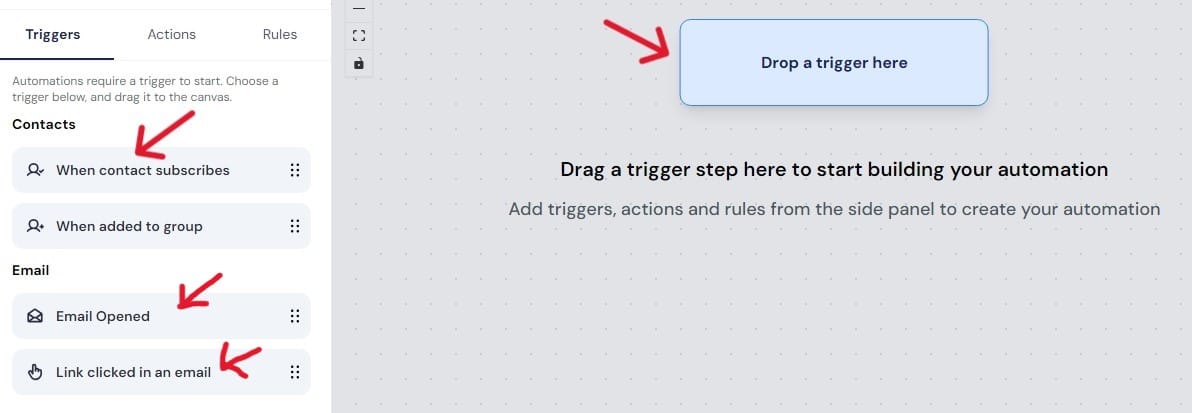
Step 9: Set Up Automation (Optional — 2 Minutes)
Once you have mastered manual campaigns, it’s time to automate your email marketing. Seamailer makes automation simple and visual, no coding or complex flowcharts needed.
You can create workflows like:
- Welcome sequences for new subscribers.
- Abandoned cart reminders for eCommerce.
- Birthday or anniversary emails for loyal customers.
- Re-engagement campaigns for inactive users.
To get started:
- Go to Automation → Create Workflow.
- Choose a trigger (e.g., new signup, purchase, link click).
- Add actions (e.g., send email, wait 2 days, tag contact).
- Save and activate your workflow.
That’s it, Seamailer will handle the rest automatically, sending the right email to the right person at the right time.

Step 10: Explore Integrations and Growth Tools (Optional — 1 Minute)
To make the most of Seamailer, connect it with your favorite tools.
Seamailer integrates seamlessly with platforms like:
- Shopify (for eCommerce automation)
- WordPress (for blog signups and lead magnets)
- Zapier (for thousands of other apps)
- CRM tools like HubSpot or Pipedrive
You can also embed Seamailer signup forms on your website or landing pages to keep growing your list effortlessly.
Bonus: Best Practices for Seamailer Success
Getting started is just the first step. To ensure you get the most out of Seamailer, follow these proven email marketing tips:
- Clean your list regularly: Remove inactive subscribers to improve deliverability.
- Use A/B testing: Test subject lines, content styles, and send times to see what performs best.
- Keep your tone conversational: Write like you’re talking to one person — not a crowd.
- Segment your audience: Send more relevant emails that resonate with different customer types.
- Use visuals wisely: A good image supports your message, not distracts from it.
- Always include a clear call-to-action: Tell readers exactly what you want them to do next.
Remember, the best emails don’t just look good — they connect and convert.
Common Questions New Users Ask
1. Do I need any design or coding skills to use Seamailer?
Not at all. Seamailer’s drag-and-drop editor is built for non-designers. You can create stunning emails using templates in minutes.
2. Can I import my contacts from another email platform?
Yes. Seamailer allows easy CSV import and even has migration support for major tools like Mailchimp or ConvertKit.
3. How does Seamailer handle deliverability?
Seamailer uses verified sending domains, authentication (SPF, DKIM, DMARC), and smart IP reputation systems to ensure your emails land in inboxes not spam folders.
4. Can I send automated campaigns?
Absolutely. You can set up automated workflows for welcomes, abandoned carts, and re-engagement with zero hassle.
5. What kind of analytics do I get?
You will get detailed insights on open rates, clicks, bounces, and conversions plus easy visual reports to track your growth over time.
Conclusion: You Can Master Seamailer in 10 Minutes
Starting with Seamailer isn’t complicated, it’s actually designed to make email marketing enjoyable again.
In just 10 minutes, you can:
Create an account
Import your contacts
Design your first campaign
Send your email
Track performance instantly
That’s the beauty of Seamailer, you don’t waste hours figuring things out or paying extra for features you don’t need. It’s fast, affordable, and built to grow with your business.
So, what are you waiting for?
Head over to Seamailer.app and send your first campaign today. Your audience — and your inbox performance — will thank you.